How to carve a Halloween pumpkin and use the pulp
Which pumpkin to choose, how to hollow it out without the struggle, when to carve it so it lasts until the 31st, and what to cook with the insides. Plus a knife-free plan B.
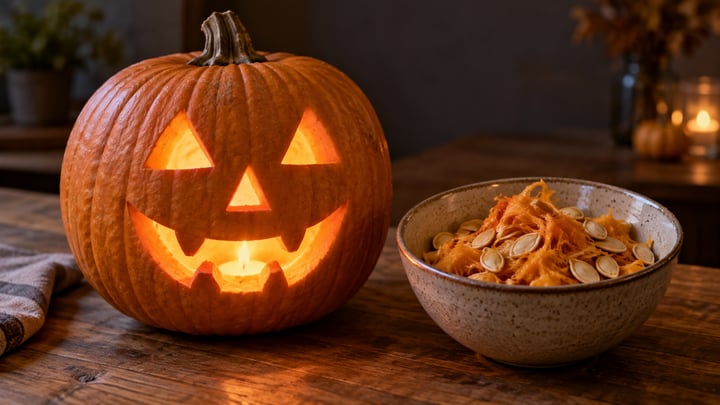
Carving a Halloween pumpkin sounds like a fun craft project but often ends up being a half-hour battle with a spoon if you don't know where to start. With three decisions—the pumpkin, where to open it, and when to carve it—it can be done without the struggle, and what you scoop out doesn't have to go to waste: the seeds can be toasted and the pulp can end up in a pie. If this sounds like too much, there is a knife-free plan B at the end.
Which pumpkin to choose
The ideal choice is the Halloween pumpkin: orange, with a smooth, thin skin, thin walls, and hollow inside. It is specifically selected for this: it is easy to carve and sits firmly. Its pulp, however, is watery and lacks flavor.
If you can't find one—in the Southern Hemisphere, October is spring and they are scarce—the best alternative is a large, round kabocha squash that sits firmly. It is harder to carve because the skin is tough and the wall is thick, but it has two advantages: the carving shows the orange of the pulp against the green of the skin, and what you scoop out is the best pulp for cooking.
It is best to avoid the butternut squash, which is only hollow in the round part and has a solid neck, and the Hubbard squash, whose skin is almost impossible to cut. In the squash guide you can find the differences between varieties.
Hollowing it out without the struggle
Open it from the bottom, not the top. Mark a circle of about 12 to 15 cm at the base and cut it out. A good portion of the seeds and strings will come out attached to that lid, the pumpkin will sit directly over the light, and there is no lid on top that can sink or burn.
To remove the rest, use an ice cream scoop or a large metal spoon, not your hands: the edge scrapes the strings out in one pass. Throw everything into a bowl of water: the seeds float and the strings sink, so they separate almost on their own.
Afterward, thin out only the wall where the face will go, scraping from the inside until it is 2 to 3 cm thick. Carving becomes much easier and more light passes through. There is no need to touch the rest of the wall. Save that scraped pulp: that is the part to cook with.
Carving and lighting
Draw the face with a marker before cutting. Simple shapes—triangles, a mouth with few teeth—look better from a distance than fine details, and they are less likely to break.
Cut with a small serrated knife (a small bread knife), moving it like a saw and without prying: prying is what breaks the wall and causes the knife to slip. Push the pieces inward from the outside. If working with children, let them draw and have an adult do the cutting.
For the light, an LED candle is best: it doesn't blow out, it doesn't burn the pumpkin from the inside, and it is safe near children and curtains. If you use a real candle, make a small hole at the top, in the back, so the heat can escape, and do not leave it lit unattended.
What to do with the insides
The seeds, separated from the strings, are boiled for a few minutes in salted water and then toasted: these are toasted pumpkin seeds. The strings can be used to add flavor to a broth or can go into the compost.
The pulp you scraped from the wall is the good part. Roasted and pureed, it goes into pumpkin pie with mascarpone, pumpkin pie, pumpkin bread, or a creamy soup. With a kabocha, it is top-quality pulp; with a Halloween pumpkin, which is watery, it is best to roast it a bit longer to let it lose water before using it in soup. Cook it or store it in the refrigerator on the same day.
When to make it so it lasts until the 31st
Whole and uncarved, a pumpkin lasts for weeks in a cool place, so it can be bought ahead of time. Once carved, however, it lasts between 3 and 5 days before shriveling or molding, and even less in the heat: in the Southern Hemisphere, where Halloween falls in spring, count on 2 or 3 days. The safest bet is to hollow and carve it on October 29th or 30th.
To extend its life, apply petroleum jelly (Vaseline) to all the cut edges, which slows down drying, and store it in the coolest part of the house at night. If it still shrivels, a few hours submerged in cold water will help it recover significantly.
If you have never carved one, a practice run a few days before with any squash is useful to lose the fear of the knife, and the pulp from the practice run does not go to waste.
Plan B: decorating without carving
If all this seems like too much, you can have a Halloween pumpkin without knives: paint the face with a washable marker or tempera paint, or cut it out of black paper and stick it on with tape. There is no need to hollow it out, it lasts for weeks instead of days, and it is also suitable for younger children.
And it has an advantage that the lantern does not: it can be eaten whole afterward. On November 1st, wash it, cut it, and cook it, so with a kabocha, the decoration ends up as a pumpkin pie.
Frequently asked questions
How long does a carved pumpkin last?
Between 3 and 5 days in a cool place, and less in the heat. Whole and uncarved, it lasts for weeks.
Can you eat the pumpkin after using it as a lantern?
It is not recommended: after days of being open, at room temperature, and with a light inside, the pulp is no longer safe. The one to eat is the one you scraped out the day you hollowed it. If you want to eat the whole pumpkin, there is plan B: decorate it without carving.
What knife should be used to carve a pumpkin?
A small serrated knife, like those for bread or tomatoes, or the small saws from carving kits. Large, smooth-bladed knives get stuck and, if forced, will slip.
What do you put inside to light it?
An LED candle is the safest option: it doesn't blow out or burn the pulp. With a real candle, make a small hole at the top for the heat to escape and do not leave it alone.