How to make caramel: the wet and dry techniques
For flan, bread pudding, or any caramelized mold: how the wet and dry techniques differ, how to perform each one, and what to do if it crystallizes.
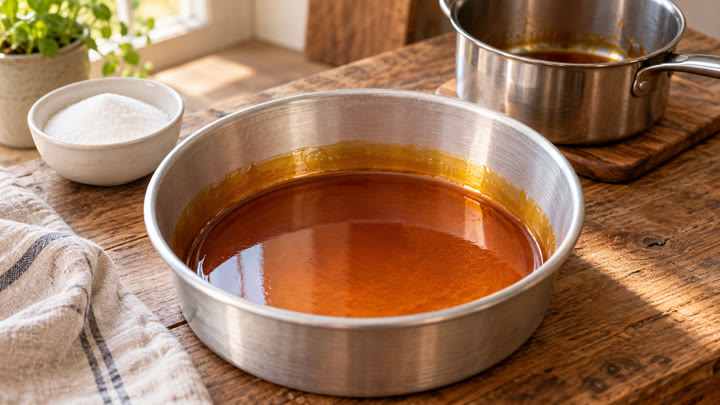
Caramel can be made in two ways, and both reach the same result. In the wet technique, sugar is first dissolved in a little water and the syrup boils until the water evaporates and it begins to take on color. In the dry technique, the sugar goes into the saucepan alone and melts directly with the heat. The wet method is slower, colors more evenly, and provides time to watch; the dry method is faster and requires attention from the very first minute. Either one works for caramelizing a flan mold, a loaf pan, or the pan for a Tarte Tatin.
How they differ
Time. The wet method takes longer because the water must evaporate first: as long as water remains, the syrup does not reach the temperature at which the sugar takes on color. That wait is precisely what provides a margin for error.
Color. In the wet method, the sugar is already dissolved, so it colors evenly. In the dry method, it melts first where the heat is strongest, and that same spot is the first to burn.
What can go wrong. In the wet method, the syrup may crystallize and become sandy. In the dry method, it may burn on one side while sugar remains unmelted on the other.
The wet technique, step by step
Proportion. As a starting point, 150 g of sugar with 50 ml of water, about 3 1/2 tablespoons; for 250 g, about 5 1/2 tablespoons. It also works with more water: the sugar dissolves more easily and just takes longer to take on color.
First dissolve, then boil. Stir the sugar with the water over low heat until the syrup is transparent, with no grains at the bottom or on the sides. With little water, the sugar only dissolves when hot and by stirring: if it goes onto the heat like wet sand and is left untouched, white lumps remain that later form crystals.
Once it boils, do not stir. A spoon entering and exiting drags crystals and seeds them into the syrup. If the color advances more on one side, rotate the saucepan by holding the handle.
Medium-low, even heat. In a thin aluminum flan mold, placed directly on the burner, heat concentrates: one sector takes on color while another remains white. It is advisable to move the mold over the flame to distribute it.
First it bubbles, then it colors. For several minutes the syrup boils transparently and it seems like nothing is happening: this is the water leaving. When the bubbles become larger and slower, it is almost ready. The color appears at the edges and spreads quickly.
In a saucepan or in the mold. If the mold is metal, the caramel can be made right there to save a step, but the entire mold heats up: always use oven mitts (oven gloves).
If the syrup crystallizes
Opaque is not bubbles. A syrup that becomes cloudy, opaque, or sandy is starting to crystallize, even if it is boiling. This happens when a sugar crystal—a grain stuck to the wall, one brought in by the spoon—gives the rest a place to re-form. Removing it from the heat at that moment does not stop it: upon cooling, it finishes hardening like a granulated paste.
It can be fixed: return to low heat, without touching. The crystals melt with the heat, just like in the dry technique, and in a few minutes it returns to being liquid and amber.
If it has not yet taken on color, a splash of water can also be added and dissolved again. With caramel that is already golden, do not: water on such hot caramel splashes violently.
To prevent it: run a wet brush along the sides of the saucepan, or cover it for one or two minutes when it starts to boil, so the steam washes away the stuck grains. A few drops of lemon juice in the water also help: the acid converts part of the sugar into other sugars that make it harder to form crystals.
The dry technique, step by step
Heavy-bottomed, light-colored saucepan. The heavy bottom distributes heat and prevents one spot from burning before the rest. The light bottom allows you to see the real color; in a dark saucepan, it is hard to know what stage it is at.
An even layer, over medium heat. Sugar spread across the entire bottom melts more evenly than a small mound in the center.
Do not touch until a good portion has melted. The sugar begins to melt at the edges or where the heat hits hardest. When there is already a large liquid area, move it with a wooden spoon or a silicone spatula, pushing the dry sugar toward the melted part.
Lumps go away on their own. It is normal for clumps to form when stirring. Over medium-low heat and with a little patience, they finish melting. Turning up the heat to hurry them is the surest way to burn the rest.
Since the sugar is not dissolved, the dry method does not crystallize like the wet one. Its risk is the opposite: that one sector burns while sugar remains unmelted in another. That is why the heat should never be high.
The stage: amber color
The desired color is amber, like dark honey. Lighter, the caramel is almost just sweet; darker, it becomes bitter. Between one and the other, there are only a few seconds.
It continues cooking off the heat. The hot saucepan continues to provide temperature, so it is best to remove it one shade before the desired one.
If the color is not clearly visible, a drop on a white plate shows it exactly as it is.
If it smells burnt or smoke appears, it is already ruined. It cannot be fixed: the bitterness remains and is noticeable in the dessert. It is better to start over; it is only sugar.
Covering the mold
Without waiting. If the caramel was made in a saucepan, pour it into the mold as soon as it comes off the heat; if it was made in the mold, remove it and start rotating it immediately. In both cases, rotate the mold to cover the base and sides, and you must move quickly: it hardens in seconds.
It is fine if it hardens. It does not need to remain liquid: in the oven, with the moisture of the preparation, it melts again, and in the refrigerator, it finishes turning into the sauce that falls when unmolding.
If it hardened before covering everything, a metal mold can go over low heat for a few seconds to soften it again.
Caution: it burns more than boiling water
Caramel is much hotter than boiling water and also sticks to the skin, so a splash burns more and for a longer time.
Use oven mitts or a dry kitchen towel to hold the mold, do not test it with your finger, and keep children away from the stove.
If it splashes, use cold tap water on the area, immediately and for several minutes.
Cleaning the saucepan
There is no need to scrub. Fill the saucepan with water, bring it to a boil, and the stuck caramel will dissolve on its own. This also works for the spoon and the mold after unmolding.
Frequently asked questions
Which technique is recommended if I have never made caramel?
The wet one. It takes longer, but those minutes of transparent syrup provide a margin to watch without rushing, and the color advances more evenly. The condition is to dissolve the sugar well before it boils.
How much sugar is needed?
With 150 g, you can cover the base of a 20-22 cm flan mold. Some recipes use more so there is leftover sauce when unmolding.
Why did the caramel end up hard and stuck to the mold?
It needed more time in the refrigerator. Caramel becomes liquid over the hours as it absorbs moisture from the flan. If a layer still remains stuck, it is normal: it comes off with hot water.
Is it normal for it to crackle when cooling?
Yes. Caramel contracts as it cools and cracks like glass; in the oven, it melts again.
Should I wait for it to harden before pouring the mixture?
It is advisable: with the caramel firm, the mixture rests on top without dragging it.
Can it be made with brown or muscovado sugar?
It is possible, but the sugar is already dark and the color ceases to be a reliable guide. To learn, white sugar is recommended.
Can the mold be caramelized in advance?
Yes: the caramelized mold waits patiently while the mixture is prepared. What is not recommended is leaving the caramel in the saucepan to pour later, because it hardens and must be melted again.
In pictures
What not to do: with too little water and without stirring at the beginning, the sugar stayed in white lumps while one edge was already taking on color. See “The wet technique, step by step”.